

Help
Setting up your club in the Studio
The Studio is where you add your club to Find Your Club: your details, your team, your photos and a 360° virtual tour. This guide walks you through it from start to finish. No technical knowledge needed; if you can fill in a form and drag a photo onto a page, you can do this.
1Get access
The Studio isn't open to the public: there's no “sign up” button. Someone has to add your club's email address to the system before you can get in. This keeps club pages safe, so only your club can edit your club.
Email Mary's Youth Club at youthclub@marys.org.uk and ask to be set up on the Studio. Tell them:
- your club's name
- the one email address you'll use to sign in (use an address the club controls, like a shared club inbox, not a personal one that might change)
They'll link that email to your club. Once they confirm it's done, you're ready to sign in. If you try to sign in before this is set up, you'll see a message saying no club is linked to your account.
2Sign in
Go to the Studio (the /studio page). There are no passwords. You type your email, and the site sends you an email with a sign-in code and a sign-in link. Use whichever is easier.
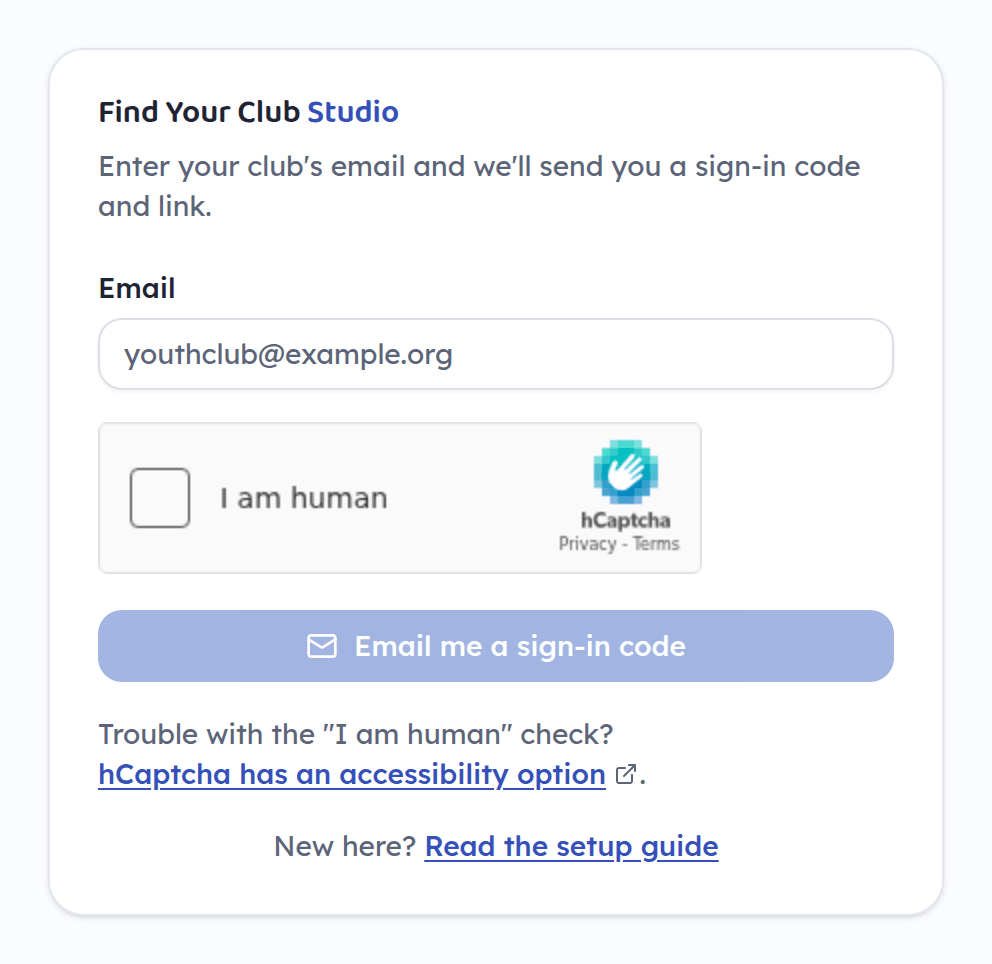
- Type the email that Mary's Youth Club linked to your club.
- Tick the I am human box. Sometimes it asks you to pick out some pictures first. If the pictures are hard for you, hCaptcha has an accessibility option: there's a link to it under the sign-in form.
- Click Email me a sign-in code.
- Open the email. Either type the code from it into the Studio and click Sign in with this code, or click the link in the email and then Sign in to the Studio.
3Open your club
If your account is linked to one club that's already set up, the Studio opens it straight away. Otherwise you'll see a chooser:
- First time? Use Create a new club. Type your club's name and click Create club. Its web address is already set up for you by Mary's Youth Club, so there's nothing to choose.
- Look after more than one club? Use Edit an existing club, choose one from the list and click Edit this club. Hidden clubs are marked “hidden”.
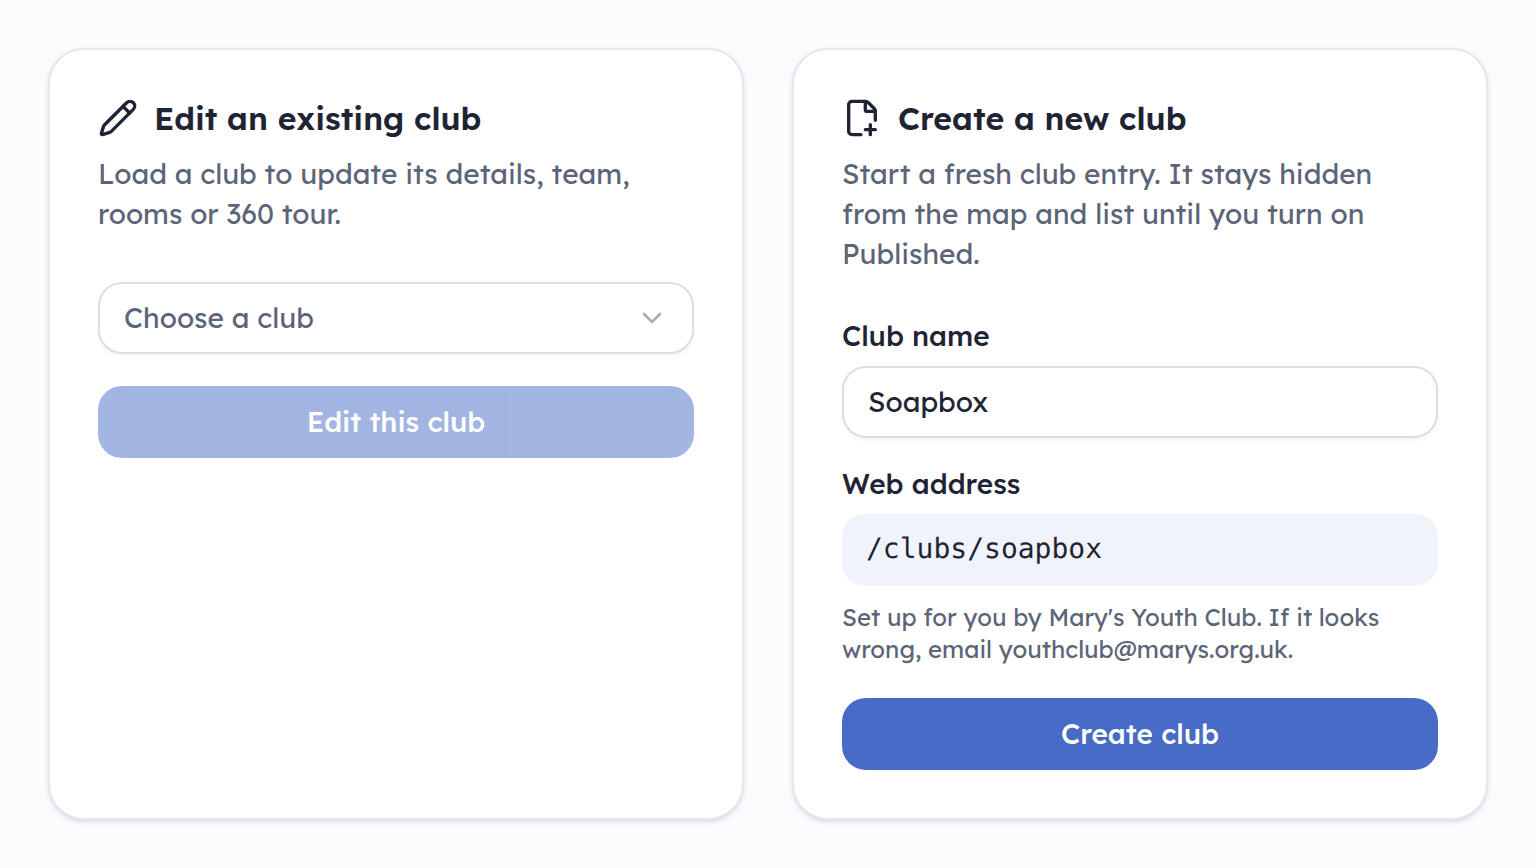
Once your club is open, you'll see five sections across the top, each its own page. You'll work through them left to right:
- Details: visibility, name, address, logo, banner, contact, opening hours, programme, accessibility, how to find you and FAQs
- Team: the people who run the club
- Rooms: your 360° photos, each named as a room, with the clickable links between them
- Media: every file you've uploaded, what it's used in, and a way to delete files you no longer need
- Preview: your club page as visitors will see it, including changes you haven't saved yet. You can open the tour there too, without leaving the Studio.
4Fill in the details
Start on the Details page. It's split into panels (Visibility, Basic details, Contact, Social feed, Opening hours, Programme, Accessibility, How to find us, FAQs and Tour terms). Only Basic details starts open: click a panel's heading to open it.
Your club's Web address (like marys-youth-club) is the end of its page's address, and your photos are filed under it. It's set when the club is created and can't be changed from the Details page. If it needs to change, ask Mary's Youth Club.
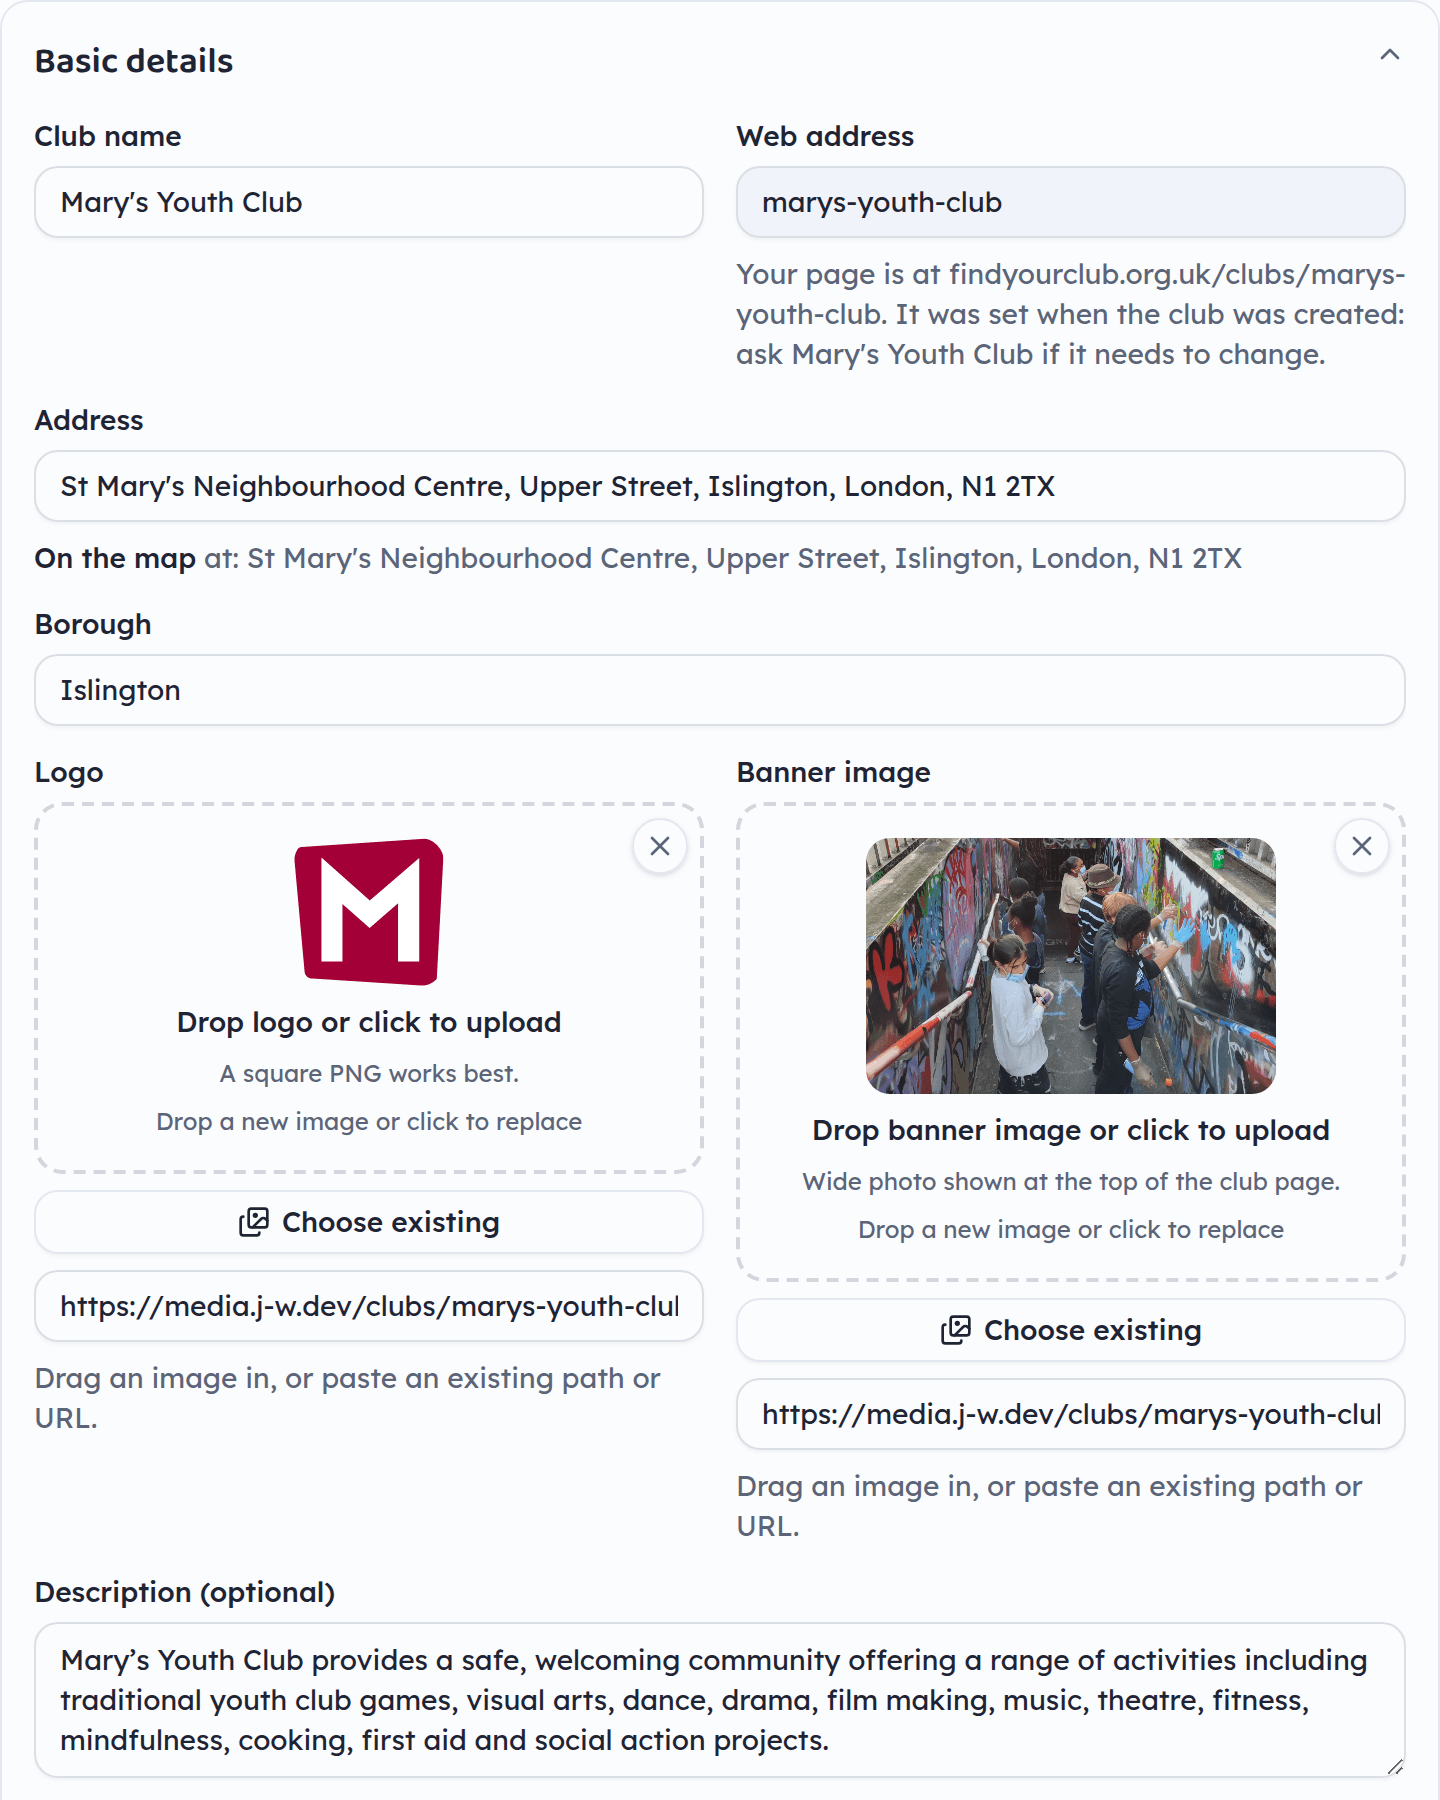
Work down the rest of the page. They're all plain fields:
- Address (required): start typing and pick your address from the suggestions, which puts your club on the map. The line under the box tells you whether it's On the map or Not on the map yet. If your address isn't in the suggestions, type it in full and save anyway: your club is listed without a map pin, and the Studio keeps looking for the address each time you open your club. If you change the address, pick it from the suggestions again. Type the Borough yourself.
- Description: a short, friendly paragraph about the club.
- Activities: tap every tag that fits, like Music, Drop-in or Free meals or snacks. These tags are what young people filter by on the map. If you need one that isn't there, email Mary's Youth Club. Tags from before the list existed show underneath: swap them for a tag from the list, then remove them.
- Ages: tick every age group the club is for (5-9, 10-13, 14-16, 17-19 and 20-25). Young people filter by these, so a club with none ticked won't show when someone picks an age.
- Contact: email, phone, website and any social accounts.
- Social feed: shows a few of your Instagram or TikTok posts on your club page, under a “Follow us” heading. On the post itself (not your profile), tap Share, then Copy link, and paste that link in. No log-in or account connection needed, and nothing shows until you add a link.
- Opening hours: approximate is fine (“weekday evenings, around 4-8pm”).
- Programme: an optional picture of your timetable (a photo or screenshot, as a JPEG, PNG or WebP), which visitors can download. Once it's uploaded, type it out in Programme as text too: screen readers can't read a picture, and some young people find text easier. When you upload a new programme, update the text to match.
- Accessibility: wheelchair access, noise levels, how noise changes, how busy shared spaces get, quiet spaces, whether fidget tools are available, and a longer Accessibility information box. This really helps young people decide whether a club is right for them. If you leave wheelchair access blank, your club won't show when someone uses the wheelchair filter.
- How to find us: an arrival note saying what happens when someone walks in, a photo of your front door, and nearby stops. Once your club is on the map, use Find nearby stops (it searches around your map pin), or Add stop to add one yourself. A stop's Position on the mini map is optional: a stop you add starts at your club, and you can leave both boxes empty to list it without a marker.
- FAQs: common questions young people and parents ask.
- Tour terms: nothing to fill in. It explains words like “hotspot”.
5Images: what you need and what format
All images upload the same way: drag a file onto the dashed box, or click it to browse. For the logo, banner, front-door photo and team photos, an Adjust image window opens first so you can zoom and position the photo: click Apply when it looks right. You'll then see a progress bar, with a Cancel button, and then a preview. To reuse a file you've already uploaded, use Choose existing. Here's what each image is for:
| Image | Where it shows | Best format | Shape / size |
|---|---|---|---|
| Logo | Details page · top of your club page and your marker on the map | PNG | Square. A transparent PNG looks best. |
| Banner | Details page · wide strip at the top of the page | JPEG | Landscape, cropped to 16:10 (for example 1600×1000). A real photo of the club. |
| Team photo | Team page · next to each person | JPEG | A head-and-shoulders photo, cropped to a circle. |
| Front door photo | Details page (How to find us) · the Getting here section | JPEG | A clear photo of your entrance from the street. |
| Programme | Details page (Programme) · the Programme section | JPEG, PNG or WebP | Your timetable as one image: a clear photo of the printed one is fine. |
| 360° panorama | Rooms page · the virtual walk-through | JPEG or PNG | A 360° photo (twice as wide as it is tall), as large as your camera produces. Don't shrink it first: the Studio makes the smaller sizes itself and keeps your full-quality copy. |
Accepted file types: JPG/JPEG, PNG, WebP, GIF or AVIF (not SVG: save a logo as a PNG instead). Maximum size: 25 MB per file. Upload panoramas at full quality: the Studio renders each one into several sizes and serves each visitor the largest their phone or laptop can actually display, so shrinking a photo yourself only makes the tour blurrier. Only resize if a file is over 25 MB and gets rejected.
If a photo uploads but the Studio can't prepare it for the website, it says so and offers Try again. The photo is used as it is in the meantime, so nothing is lost, but it may load slowly for visitors until it's replaced.
Tidying up your files
The Media page lists every file you've uploaded and marks the ones that are “Not used anywhere”. Clean up unused files shows you the list first, then deletes only those files, and keeps anything your last saved version still uses. You can also delete one file with its bin button: the Studio always asks first, and won't delete a file your saved club still uses. Deleted files can't be recovered, so save your changes before cleaning up.
6Add your team
On the Team page, click Add member for each person who runs the club. Only a name and job title are needed. A photo (drag it onto Add photo), a warm bio and a note on languages or SEND/neurodivergent experience all help young people feel at ease before they walk in.
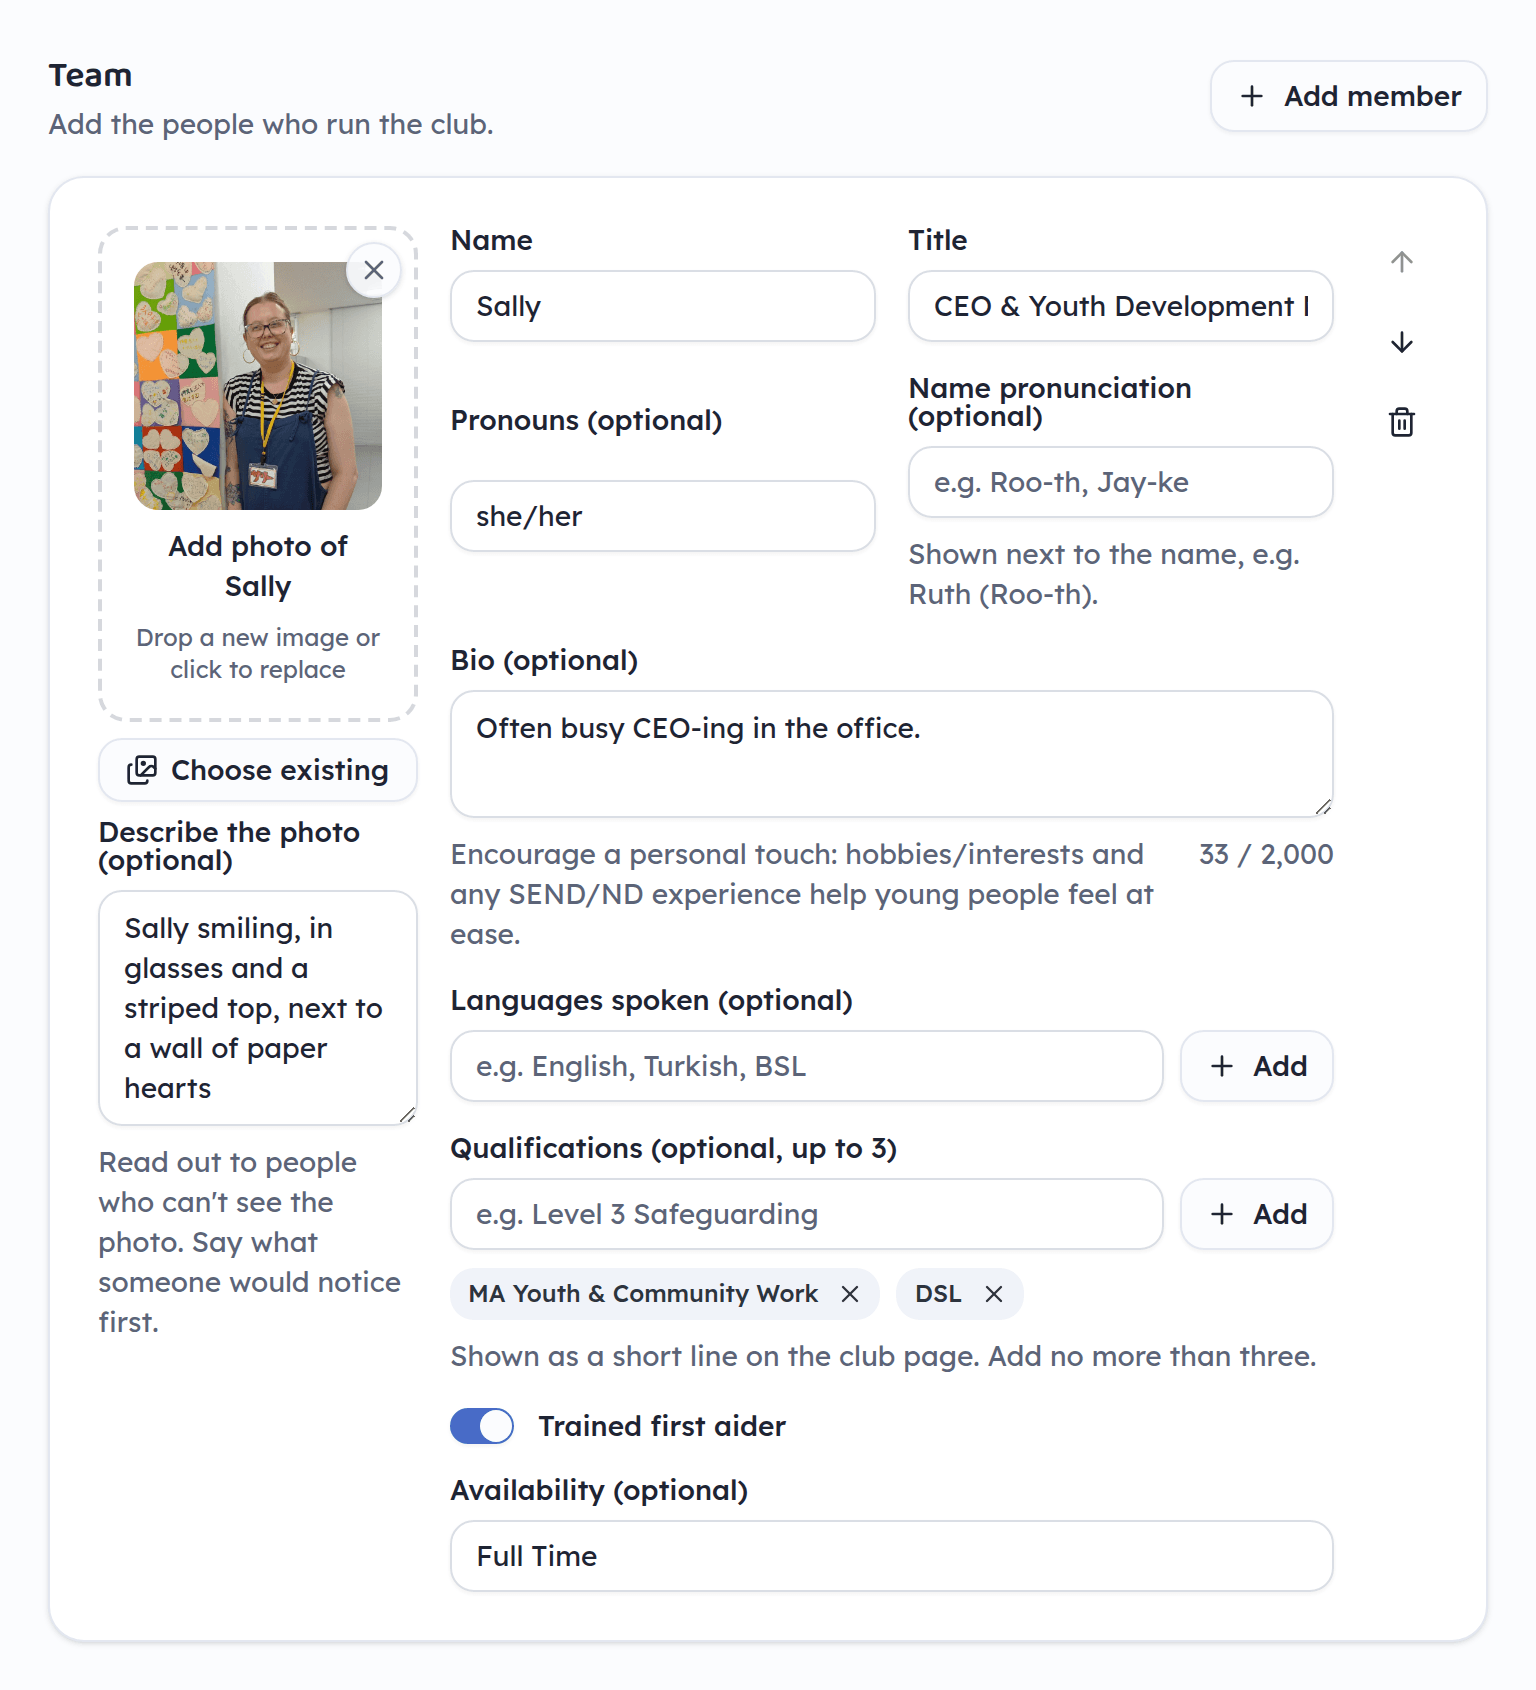
Optional extras: pronouns, how to say their name, a short bio, languages spoken, up to three qualifications, a “trained first aider” toggle, and when they're usually around. Use the arrows to change the order people appear in.
Once a person has a photo, a Describe the photo box appears under it. What you type is read out to people who can't see the photo, so say what someone would notice first: “Sam smiling, in a green hoodie, in the games room”. Without it, screen readers just say “Photo of Sam”.
7Build the 360° tour
This is the part that makes a club page come alive: a virtual walk-through where a young person can stand in a room and look all around. One room is one panoramic photo, plus hotspots: markers that link one room to the next, or show a short label.
1. Upload your photos
On the Rooms page, drop your 360° photos onto the box at the top. You can select several files at once (or choose one you've already uploaded via Choose an already-uploaded 360° photo). Each shows a progress bar while it uploads, and Cancel stops any that haven't finished. Each photo becomes a new room. Don't worry about file names; you'll give each room a proper name next.
2. Name each room
Click a room and type its Name (e.g. “Main Hall”). This is what visitors see everywhere. If you rename a room later, any hotspot linking to it follows the rename.
Add a description, noise level and quiet-space toggle on the same card: the same accessibility details that help young people plan a visit. Use the up/down arrows next to the name to reorder rooms.
The tour starts in the room you mark as the Entrance (see Choosing your entrance below), not simply the first one you uploaded. Until you choose one, it starts with the first room in the list. Every room opens facing the middle of the photo.
3. Add hotspots (the clickable markers)
With a room selected, its 360° photo appears with the hotspot controls beside it (or below it on a smaller screen). Drag, or use the arrow keys, to look around.
- 1Click on the spot in the photo where you want the marker (a click without dragging). Or, without a mouse, turn the view until the cross in the middle is on the spot and press Add link to another room here or Add info label here. The New hotspot panel then says “Position set”.
- 2In the New hotspot panel, choose the Type:
- Info label: shows a short label next to the marker. Type it in Label (e.g. “Table tennis here”).
- Link to another room: takes the visitor to another room. Pick it in Room it leads to, and add a label if you like, such as “Head to the Kitchen”.
- 3Click Add hotspot. It appears in the list below, marked Link or Info. Repeat to link every room to its neighbours so people can walk the whole building. Hotspots can't be moved: to change one, remove it with its bin button and add it again. If you remove one by mistake, press Undo in the message that appears.
Choosing your entrance
Open the room a young person walks into first, often the front door or reception, and turn on Entrance. It gets an “Entrance” label in the room list. Your tour then starts there, everywhere it appears: your club page, the 360° viewer, and the tour on your own website.
The other rooms line up after it in the order someone would reach them, following your link hotspots: first the rooms the entrance links to, then the rooms those link to, and so on. Rooms nothing links to go at the end. The room list on the Rooms page shows your rooms in this order, so it matches what visitors see. Where two rooms are the same number of steps away, you choose which comes first with the up and down arrows; they only swap rooms the same number of steps from the entrance, since moving any other room wouldn't change the order. Only one room can be the entrance; turning it on for another room turns it off for the old one. Without an entrance, the arrows move rooms freely and visitors see them in that order.
Replacing a room's photo
Got a better photo for a room you've already set up? Don't use the bulk-upload box at the top: that always creates a new room. Instead, open that room and use its own “Replace the photo of…” box. It swaps the photo in place and keeps the room's name, hotspots and every link pointing at it.
Putting the tour on your own website
While your club is published, the Visibility section at the top of the Details page shows a box called “Put the tour on your website”. Once your tour has at least one room, it has a short piece of code. Click Copy code and paste it into an “embed” or “custom HTML” block on your club's website (most website builders have one). Your tour then appears on that page, starting with a photo of your entrance (or your first room, if you haven't chosen one) and a Start the 360° tour button, with a link back to your full page on Find Your Club.
8Save
Before you save, check the Preview page: it shows your club page as visitors will see it, including Details and Team changes you haven't saved yet. Rooms changes are already live there and on your club page, because they save on their own.
When you're happy, click Save at the top of the page. If your club isn't on the map yet, Save has one more go at finding your address first. Your club page updates straight away, and the map and list within about a minute. You can come back and edit any time. On a shared computer, click Sign out when you've finished: it signs out this computer only, so colleagues using the same club email elsewhere stay signed in.

Good practice
Taking 360° photos
- Photograph the rooms a young person will actually use, starting with the entrance.
- Put the camera at about head height in the middle of the room.
- Keep the lights as they are during a session, so the photo shows what the room really looks like.
- The middle of the photo is what visitors see first, so point the camera at the main part of the room.
- Upload the original file straight from the camera.
Photos of people
A 360° photo shows the whole room, so check who is in it. Only include people who have agreed to be on a public website, and follow your organisation's own photo consent and safeguarding policies. The same goes for team photos, names, pronouns and bios, and any post you add to your Social feed: check everyone in it is happy for it to be shown here too, even if it's already public on Instagram or TikTok.
Writing accessibility information
- Describe a normal busy session, not the quietest one. Young people use this to decide whether they can cope.
- Mention lighting, smells, crowds, toilets, lifts and steps, and when it's quietest.
- If wheelchair access is partial, say which rooms or routes are affected, rather than rounding up.
- Keep each room's noise level and Quiet space switch in step with the quiet spaces listed on the Details page.
- Write your own arrival note. If you leave it blank, the page shows a general line telling visitors to ask any member of staff, so make sure that's true for your club.
When staff change
To add, remove or change the email that can edit your club, email youthclub@marys.org.uk. This can't be done from the Studio.
Troubleshooting
If something goes wrong saving, uploading, or loading your club, the message sometimes ends with a short code in brackets, like (Reference: 4f9a2c1b). That's not something to fix yourself: it just ties the error to what happened on our side at the time. If it keeps happening, include it when you email us, and we can look up exactly what went wrong instead of guessing.
- “No club linked to your account”
- Your email hasn't been connected to a club yet, or you signed in with a different address. Email youthclub@marys.org.uk to get set up, and make sure you use the exact email they linked.
- The sign-in email didn't arrive
- Check spam/junk, wait a minute, and make sure you typed the email correctly. Then ask for a new email: each code and link works once and expires. On the “Check your email” screen, use Use a different email or send again. If it says too many emails have been asked for, wait a few minutes first.
- The link or code said it had expired
- Ask for a new email and use the newest code or link: each one works once, and an older email stops working when you ask for a new one. Typing the code is the most reliable way in.
- The “I am human” box doesn't appear
- Check your internet connection, and turn off any ad or tracker blocker for this site, then reload the page. Some work networks block it: try again on your phone's data if you can.
- “You aren't authorized to edit this club”
- Your email isn't linked to this club, or the link has been removed. Email youthclub@marys.org.uk and tell them which club you're trying to edit.
- “This is the test version of the site”
- You're on the test copy, where new features are tried out. It uses the same club information as the real site, so anything you save there changes your real club page. Click Take me to the real Studio and make your changes there.
- “Press Save above once to create this club”
- Rooms can only save once the club exists. Click Save once, then carry on. A new club stays hidden until you turn on Published, so it's safe to save early.
- “Your sign-in has ended”
- Don't close the tab: your changes are still in it. Open the Studio in a new tab and sign in there, then come back to the first tab and press Save again.
- “Someone else has changed this club since you opened it”
- Someone saved this club from another tab or computer after you opened it. To avoid overwriting their work, the Studio won't save yours. Copy anything you need to keep, reload the page, and make your changes again.
- My club says “Not on the map yet”
- The Studio couldn't find your address on the map. Your club is still listed, but without a map pin or directions. Try picking your address from the suggestions again, perhaps with just the street and postcode. The Studio also keeps trying by itself each time you open your club, and adds the pin when it finds it.
- “Image is too large” / upload failed
- Files must be 25 MB or smaller and a real image type (JPG, PNG, WebP, GIF, AVIF). If a panorama is over the limit, re-export it at a lower JPEG quality rather than scaling it down, which usually gets under 25 MB while keeping the detail the tour needs.
- My panorama looks blurry
- Check whether the photo was resized before it was uploaded. The Studio can only work from the pixels it's given, so a panorama shrunk on your computer first stays soft however it's served. Re-upload the original straight off the camera and the room will sharpen up.
- My panorama looks warped / won't look right
- It needs to be a proper 360° photo (twice as wide as it is tall), taken with a 360° camera or a phone's 360/Photo Sphere mode. An ordinary flat photo won't wrap into a room.
Still stuck? Email youthclub@marys.org.uk and we'll help you get your club online. Include the reference code if the error message showed one.